Maple Almond Roca

IMG_5457.JPG

How To Make it

This is a time sensitive recipe - so I HIGHLY recommend you get everything ready first, and read the full instructions! Alternative, watch the quick 5 minute video in this post for step by step directions! :) The entire cooking process will take ~30 minutes.

  1. Prepare! Grab a heavy bottom sauce pan and place on stove top. Near the stove, have either a candy thermometer ready, or a cup of ICE cold water, a spatula (and plate to rest it on), all your ingredients measured.

  2. Grease a cookie sheet with butter- I do this by taking the foil of the butter in the recipe and rubbing it on the sheet edge to edge.

  3. Over medium heat, combine salted butter, sugar , maple syrup and water. You MUST use salted butter - it stabilizes the mixture.

  4. Once melted, give it a good stir to ensure mixture is homogeneous.

  5. Allow mixture to cook over medium heat, stirring every 3-4 minutes to ensure sugar does not burn to bottom of pan.

  6. Mixture will go from a pale anemic bubbling mixture to a light brown. At this point, sprinkle in cream of tartar. This will help with candy texture and prevent crystallization.

  7. Once mixture is brown and bubbling, place thermometer into pan, and stir every minute or so.

  8. Once mixture hits 295F-300F, turn off heat, remove from burner, and stir in almonds, and spread onto cookie sheet.

    ALT: If you DO NOT have a candy thermometer, once the candy starts to brown, place small drops into a cup of ICE cold water next to the stove. If the drops come out bendy at all, it is NOT ready. If they form a hard ball and can be ‘cracked’ the mixture ready!

  9. Allow mixture to cool.

  10. On the stove top, or in the microwave, temper your chocolate (melt it 90%, then stir in a little un-melted chocolate.

  11. Spread over the cooled candy base in a thin even layer. Sprinkle with remaining chopped roasted almonds and flaked sea salt.

  12. Let cool, and then roughly break apart or chop.

  13. Enjoy ! This makes a great gift if you package it up!

This is similar methodology to making Classic Almond Roca!

What you’ll need

3/4 Cup Salted Butter

1/2 Cup Pure Maple Syrup

1/4 Cup granulated sugar

1 1/2 Tbsps cold water

3/4 Cup Chopped dry roasted almonds

Milk or Dark High Quality Chocolate Bar (ie Lindt)

Flaked Sea Salt

IMG_5452.JPG
DSC03526.JPG
DSC03519.JPG

Nutella Fudge Stuffed Chocolate Chip Cookies

DSC03042 2.JPG

How to make it

  1. Prepare cookie dough at least 1 day in advance (or use store bought) per recipe linked! Pro tip - ALWAYS have my ultimate Chocolate Chip Cookie Dough prepped and chilling in the freezer ;)!

To Make the Fudge

  1. Line a loaf pan with parchment paper.

  2. Place milk chocolate in a pyrex measuring cup, or microwave safe bowl.

  3. Heat for 30 seconds, remove, and stir.

  4. Add in Nutella, return to microwave.

  5. Heat on 30 second intervals, stirring in-between until homogenous.

  6. Spread into prepared pan and sprinkle with a touch of salt, if desired. Place in freezer for 30-45 minutes, or until set.

  7. Remove fudge from freezer, and cut into ~1 inch chunks.

To Make

  1. Using your hand, take 1 scoop of cookie dough (~3-4 TBSPs) and flatten into a circle.

  2. Place a chunk of fudge into the cookie dough, and wrap around. Be sure to cover completely to avoid oozing in the oven!

  3. Let dough chill in fridge for an additional ~30 min.

  4. Preheat oven to 350F. Place cookie dough on a cookie sheet lined with parchment paper.

  5. Bake for 10-14 minutes.

  6. Remove form oven and let cool for 3-5 minutes on the cookie sheet.

  7. Enjoy.

DSC03031.JPG

What you’ll Need

1 Batch Chocolate Chip Cookie Dough Recipe

Nutella Fudge

1 Cup Nutella

1 2/3 Cups Milk Chocolate, chopped

Optional - Flaked Sea Salt


DSC03046.JPG
DSC03064.JPG

No Bake Mini Nutella Dream Cake

IMG_2071.JPG
IMG_2056.JPG

How to make it

For the Crust

  1. Line a 4” spring form pan with parchment paper the bottom, lightly greased on the sides.

  2. In a food processor, crumble Oreos to a dust. Add in melted butter, process until larger clumps form.

  3. Scoop into pan, and press down using the bottom of a measuring cup. Be sure to push some of the crumble up the edges.

  4. Set in freezer.

For the Fudge

  1. In a microwave safe bowl, heat heavy cream and chocolate on 30 second intervals until 67% melted.

  2. Stir with fork until mixture completely melts and becomes homogenous.

  3. Add in corn syrup and vanilla. Note, we use corn syrup here because the cake can be kept in freezer until ready to serve, or fridge. It helps ensure the fudge doesn’t become a rock. You can easily replace this layer with a traditional chocolate ganache.

  4. Pour 1/2 of mixture into bottom of crust, and return to freezer.

  5. Reserve other half for topping.

For the Filling (The Dream Layer!)

  1. Beat together cream cheese and Nutella on high in a stand mixer with a paddle attachment (or by hand)

  2. Sift in powdered sugar.

  3. Once combined, move to a separate bowl.

  4. In a stand mixer with a whisk attachment (or with egg beaters), beat the heavy cream on high until it begins to thicken and soft peaks form.

  5. Add in remaining powdered sugar and vanilla and beat until you have a nice light fluffy whipped cream,

  6. Slowly incorporate whipped cream into Nutella mixture, folding in gently with a spatula, as to not deflate the whipped cream.

  7. Once homogenous, pour on top of fudge layer.

  8. Return to freezer for 3 hours.

For the Frosting

  1. In a sauce pan, combined egg white and sugar into a slurry over medium heat. stir for 3-4 minutes until it thickens and is warm to the touch.

  2. Pour into bowl of stand mixer fitted with whisk attachment (or a bowl you can use egg beaters in).

  3. Beat on high until it becomes glossy white and soft peaks form,

  4. Slowly add in the butter - I cube mine into 8 Tbsps and add one at a time.

  5. Add in Nutella and beat well.

  6. Sift in powdered sugar and cocoa.

  7. Beat until combined.

To Assemble

  1. Once cake is set, pour remaining fudge (warm up if necessary) over top of the cake. Use an offset spatula to spread edge to edge if needed.

  2. Remove ring on spring form pan.

  3. Place cake on plate you wish to serve it on.

  4. Pipe frosting around the edges.

  5. Place a Ferrero on every other dollop of frosting.

  6. Sprinkle lightly with hazelnut dust.

  7. Keep cake in fridge and remove ~15 minutes before serving, or in freezer and remove approximately 30 minutes prior.

What you'll need

For The Crust

7 Oreos, crushed with cream

1 1/2 Tbsp butter, melted

For the Fudge

1/3 Cup dark chocolate, chopped (or use semi sweet chocolate chips)

2 1/2 Tbsps heavy cream

1 Tbsp light corn syrup

1 tsp vanilla

For the Filling

1/3 Cup cream cheese

1/3 Cup Nutella

2 Tbsps icing sugar

1/3 Cup whipping cream

1 Tbsp icing sugar

1 tsp vanilla

For the Frosting

Note, this makes more than double the frosting needed to decorate

1 egg white

1/3 Cup white sugar

1/2 Cup butter, room temperature

1/4 Cup Nutella

3/4 Cup powdered sugar

1 Tbsp cocoa powder

To Decorate

6 Ferrero Roches

Fine Chopped Hazlenuts

IMG_2109.JPG
IMG_2114.JPG

Banana Cinnamon Cupcakes with Salted Caramel Frosting & Toasted Almonds

IMG_9376.JPG

How to make it

For The Cake

  1. Preheat the oven to 350F and spray 24 miniature cupcake tins with non-stick spray. Alternatively, line 12 normal cupcake tins with paper cups.

  2. In a stand mixer fitted with a whisk attachment, beat sugar and eggs for 4-5 minutes until light and fluffy.

  3. While beating, in a small bowl mash bananas. Combine yogurt and vanilla.

  4. In another small bowl, sift together flour, baking soda, salt, and cinnamon.

  5. Turn stand mixer down to low speed. Slowly drizzle in oil down the side of the bowl.

  6. Add in banana mixture and whisk until combined.

  7. Gently fold in dry ingredients by hand.

  8. Spread batter into prepared sheet pan. Sprinkle with chocolate chips.

  9. Bake for 14-20 minutes (mini cupcakes). The cake is done when you can press gently in the centre and it springs back, and when a toothpick inserted comes out clean.

  10. Allow to cool for at least 30 minutes.

For The Frosting

  1. In a stand mixture fitted with a paddle attachment, beat soft butter until light and fluffy. Add in sifted sugar and beat until no lumps are visible.

  2. Add in 1/4 cup salted caramel frosting, and beat until smooth.

  3. IF your frosting is too thick for your liking, thin out with 1 Tbsp milk.

To Assemble

  1. Pipe frosting on cooled cupcakes.

  2. Sprinkle with crushed toasted almond slivers.

  3. Add a drizzle of salted caramel.

What you’ll Need

For the Cupcakes

1 1/2 large, or 2 small ripe bananas

1 Tbsp greek yogurt

1 tsp vanilla

1/2 Cup white sugar

1 egg

1/4 Cup oil

3/4 Cups + 1 1/2 Tbsps flour

1/2 tsp sea salt

1/2 tsp baking soda

3/4 tsp cinnamon

For the Frosting

1/2 Cup butter, room temperature

1 Cup powdered sugar, sifted

1/2 tsp sea salt

1/4 Cup Salted Caramel Sauce

To Garnish

1/4 Cup toasted slivered almonds

2 Tbsps salted caramel sauce to drizzle

IMG_9365.JPG
IMG_9352.JPG


Blackout Brownies with Salted Caramel Sauce

IMG_9083.JPG
IMG_9103.JPG

How to make it

For the Brownie

  1. Preheat oven to 350F and line an 8x8 pan with parchment paper

  2. In a stand mixer fitted with a whisk attachment, beat the eggs and sugar on high until light and fluffy.

  3. Melt the chocolate and butter in microwave on 20 second intervals.

  4. Drizzle into egg and sugar mixture with mixer running on slow.

  5. Add in a splash of vanilla.

  6. Sift in dry ingredients.

  7. Fold until just combined and spread into a prepared pan.

  8. Bake for 22-28 minutes.

For the Caramel

  1. In a medium sauce pan over medium heat, melt down the sugar. Stir continuously as to not let the sugar burn. It will first become sticky, then small lumps will start to form. Next it will start turning a light amber colour. Keep stirring JUST until all lumps have dissolved.

  2. Add in cubed butter - carful, the mixture might spit a bit.

  3. Once butter is melted in, add in heavy cream. Stir continuously (again, be careful as mixture will spit and bubble a bit.)

  4. Once cream is combined, allow to bubble for ~2-3 minutes.

  5. Stir in salt.

  6. Pour into a mason jar.

  7. Place in a bowl of ice or in fridge to help stop the cooking.

  8. This can be stored in the fridge in an air tight jar for 1 week, or used right away.

What you’ll need

For the Brownies

1/2 Cup salted butter

1/3 Cup specialty dark chocolate chips

1 Cup sugar*

2 eggs

1 tsp vanilla

1/2 Cup flour

1/3 Cup cocoa powder

2 tsps activated charcoal powder

1/2 tsp sea salt

1/4 tsp baking soda

For the Salted Caramel Sauce

2/3 Cup sugar

1/4 Cup butter

1/3 Cup heavy cream

1/2 tsp sea salt

*For a lighter option, you can substitute up to 1/3 of a cup of sugar for stevia. Just be sure to bake for a shorter period of time and check as to not dry them out!

IMG_9171.JPG
IMG_9193.JPG


Death By Chocolate Cake

IMG_0530.JPG
IMG_0541 4.JPG

How to make it

For the cake

  1. Preheat oven to 350F and line a 10x15 inch sheet pan with parchment paper.

  2. Grate up zucchini.

  3. In a stand mixer fitted with a whisk attachment combine white sugar and eggs. beat until fluffy.

  4. Drizzle in oil, yogurt, and vanilla.

  5. In a large bowl, sift together cocoa, flour, salt, baking powder, baking soda, and cinnamon.

  6. Fold half of dry ingredients into wet.

  7. Mix in almond milk.

  8. Add in rest of dry ingredients, and mix until almost combined.

  9. Add in grated zucchini.

  10. Spread batter into prepared baking sheet.

  11. Bake for 35-40 minutes. When it is done, it will spring back when poked in the middle. A toothpick inserted will come out clean when inserted.

  12. Let cool for 45-60 minutes.

  13. Using a 6inch cake ring, pop out two full circles from the sheet.

  14. In the remaining area, pop out two half crescents. Push into a springform pan to form the bottom layer.

  15. Place the pressed bottom layer + the two full circles into the freezer for 4 hours or overnight.

For the frosting (repeat steps for each variant)

  1. In a stand mixer fitted with a paddle attachment, beat butter until light and fluffy.

  2. Sift in icing sugar.

  3. In a microwave safe bowl, melt chocolate in 30 second intervals, stirring in between. When melted, there should be some visible chunks of chocolate. As you stir the heat will melt the remaining lumps into a smooth homogenous mixture.

  4. Allow to cool slightly, and add into butter cream.

  5. Add in milk to thin out.

To assemble

  1. Place bottom created layer onto a plate or piece of cardboard. Remove springform pan. Place on a wheel if you have one.

  2. Spread on a generous dose of dark chocolate frosting.

  3. Place next circle on top of frosting. Top with chocolate frosting and spread. Add on top third layer.

  4. Top with white chocolate buttercream and cover sides with crumb coat.

  5. Place in freezer for 30 minutes. Pipe on dark chocolate buttercream around the bottom, chocolate near the middle, and white chocolate at the top. Using an offset spatula, turn the wheel to spread the frosting evenly.

  6. Decorate as your heart desires! You can pipe on dollops of frosting on the top and top with oreos, sprinkle alight ring of chocolate sprinkles on top, or make a simple chocolate ganache for a drip design on the sides!

What you’ll need

Cake

3 eggs

2 Cups white sugar

1/2 Cup vegetable oil

1/4 Cup plain 0% greek yogurt

1 tsp vanilla extract

1/2 Cup almond milk

2 1/2 Cups flour

1/2 Cup cocoa powder

1 1/2 tsp baking soda

2 1/2 tsp baking powder

1 tsp sea salt

1 tsp cinnamon

3 Cups grated zucchini

White chocolate buttercream

1/2 Cup butter, room temperature

3/4 Cup powdered sugar

1/2 cup white chocolate chips

2 Tbsps milk

1/2 tsp vanilla extract

Chocolate buttercream

1/2 Cup butter, room temperature

3/4 Cup powdered sugar

1/3 semi sweet chocolate chips

2 Tbsps milk

1/2 tsp vanilla extract

Dark Chocolate buttercream

1/2 Cup butter, room temperature

3/4 Cup powdered sugar

1/2 semi sweet chocolate chips

2 Tbsps milk

1/2 tsp vanilla extract

IMG_0559 2.JPG
IMG_0608 2.JPG
IMG_0583.JPG
IMG_8951.JPG

S'mores In A Jar

IMG_8781.JPG
IMG_8786.JPG

How to make it

For the Mousse

  1. Place egg yolks, yogurt, stevia into a small sauce pan over medium heat.

  2. Cook for ~3-4 minutes stirring frequently. Add cocoa powder and salt.

  3. Meanwhile, melt down chocolate chips in microwave.

  4. Add chocolate into egg yogurt mixture.

  5. Allow to cool.

  6. Put egg whites into a stand mixer fitted with a whisk attachment and beat until fluffy soft peaks form - approximately 2-3 minutes.

  7. Slowly fold egg white mixture into chocolate mixture.

  8. Pour into 6 mini mason jars or bowls.

  9. Place into fridge and allow to chill for ~3 hours.

For the Fluff

  1. In a heatproof bowl over a double broiler, place egg whites, sugar, vanilla, and salt. Whisk together until homogenous.

  2. Allow the mixture to cook and thicken, whisking continuously until it reaches ~160F (about 8 minutes).

  3. Pour mixture into a stand mixer bowl fitted with a whisk attachment. Beat the mixture on medium for 1 minute. Increase speed to high and beat for ~5-8 minutes until mixture is glossy with picks forming.

To Assemble

  1. Remove mousse from fridge and top each with 1 crushed graham cracker.

  2. Fill remaining portion of the jars with meringue fluff.

  3. Use a blow torch to toast the tops.

  4. Top with a teddy graham and a piece of chocolate.

  5. Enjoy!

What you’ll need

For the Mousse

1 1/3 Cup semi sweet chocolate chips

1 Cup 0% MF Greek yogurt

4 egg yolks

1/2 Cup stevia

1/4 Cup cocoa powder

1/4 tsp sea salt

4 egg whites

For the crumble

6 Graham crackers

For the Marshmallow Fluff

2 egg whites

1/3 Cup + 1 Tbsp sugar

1/2 tsp vanilla

1/4 tsp sea salt

To Assemble

Teddy Grahams

Hershey’s milk chocolate bar

IMG_8816.JPG
IMG_8808.JPG
IMG_8828.JPG


Dark Chocolate Chunk & Sea Salt Tahini Cookies

IMG_8612.jpg
IMG_8614.jpg

How to make it

  1. In a stand mixer fitted with a paddle attachment, cream together butter and brown sugar.

  2. Add in maple syrup and tahini and mix until homogenous.

  3. Scrape down sides of bowl. Mix in egg and vanilla.

  4. In a separate small bowl, mix together dry ingredients.

  5. Fold dry ingredients into wet, scraping down sides occassionally.

  6. When almost combined, add in chocolate chips.

  7. Chill dough for 12-24 hours.

  8. When ready to bake, preheat oven to 350F. Scoop dough out into balls, and arrange on cookie sheet. Sprinkle lightly with flaked sea salt.

  9. Bake for ~12 minutes for small cookies. Cookies will look lightly golden and crisp around the edges when done, but still quite pale in the middle. For a crisp cookie, return to oven for an additional 2-3 minutes.

  10. Allow to cool on tray.

What you’ll need

1/2 Cup butter, room temperature

3/4 Cup +2 Tbsps brown sugar

1/2 Cup tahini

2 Tbsps maple syrup

1 egg

1 tsp vanilla extract

1/2 Cup + 1 Tbsp pastry flour

3/4 Cup bread flour

1/2 tsp baking soda

1/2 tsp baking powder

1/2 tsp sea salt

1/8th tsp cinnamon powder

+ Chocolate chips or chunks

+ Flaked Sea Salt

IMG_0495 2.JPG
IMG_0497 2.JPG


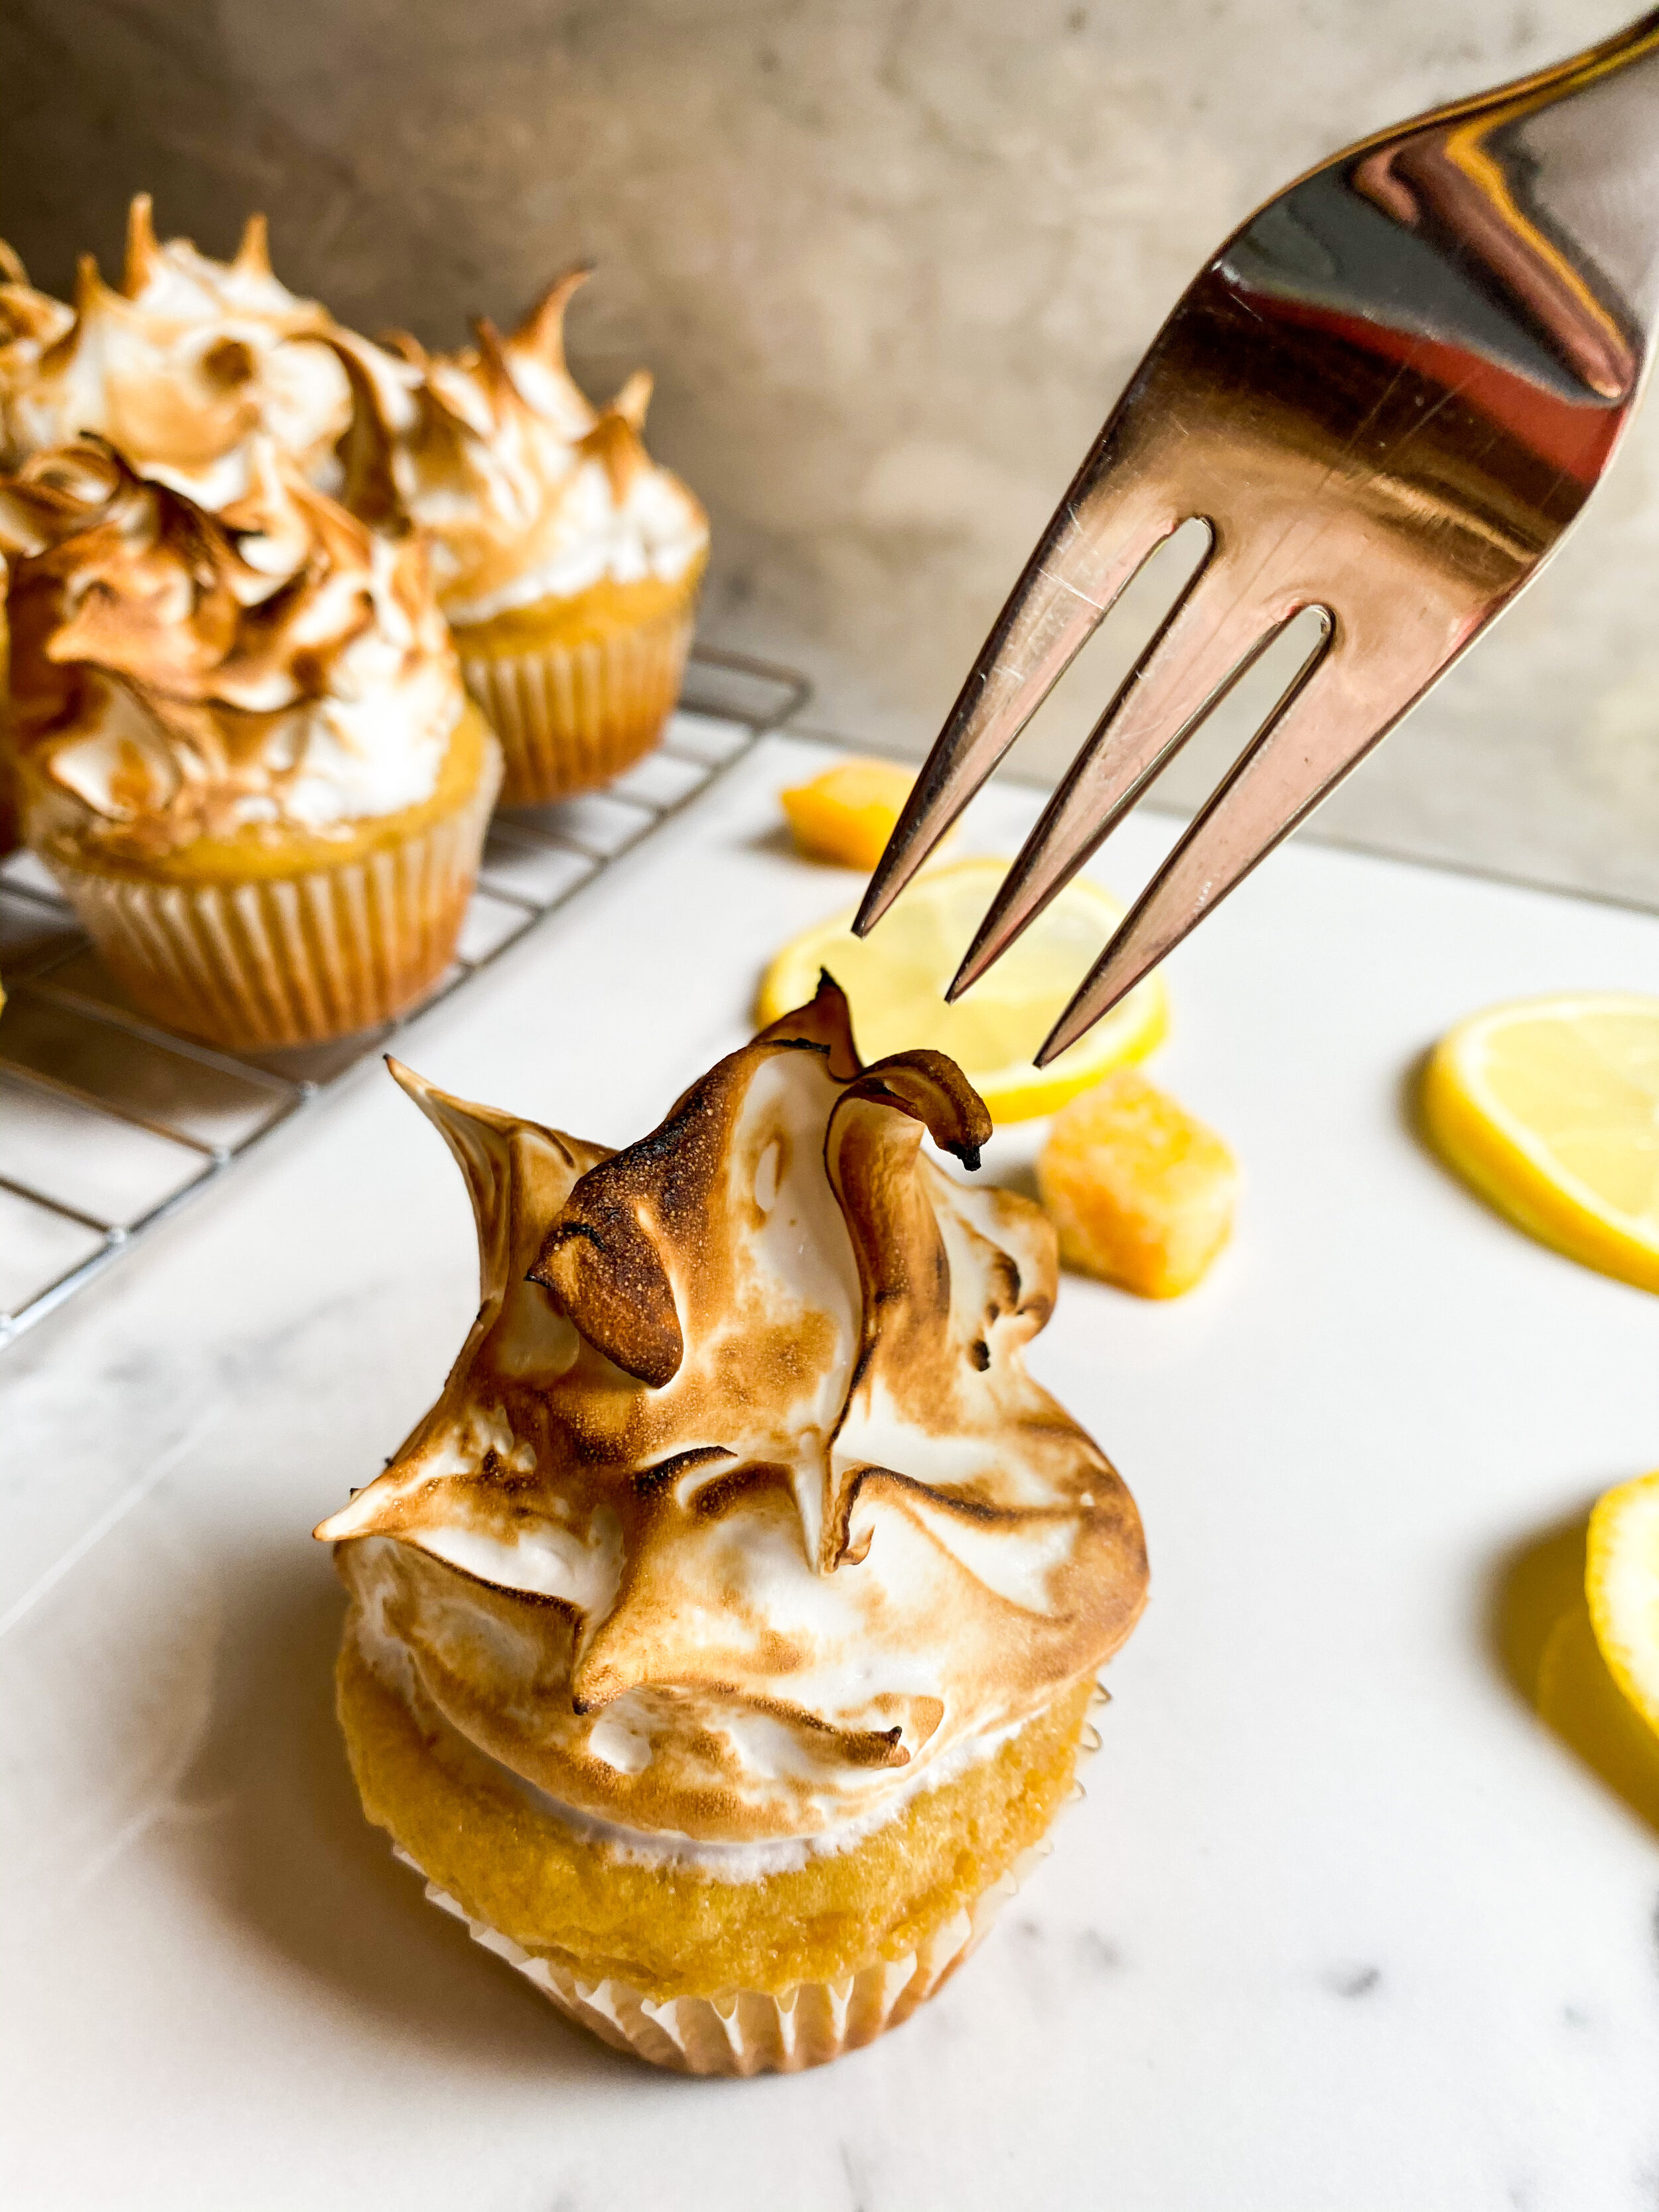
Mango Lemon Meringue Cupcakes

IMG_0285.jpg
IMG_0296.JPG

How to make it

For the Cupcakes

  1. Preheat the oven to 350F and line a muffin tin with 10-12 paper liners.

  2. In a small food processor or blender, add mango cubes (measured cubed), yogurt, and vanilla. Puree until smooth.

  3. In a stand mixer fitted with a whip attachment (or by hand), beat together sugar, stevia, and egg.

  4. Drizzle in oil.

  5. Add in pureed mango, yogurt, vanilla mix.

  6. In a small bowl, sift together dry ingredients.

  7. Fold into mango mixture. It will be very thick!

  8. Using a 1/4 cup, scoop batter out into prepared tray.

  9. Bake for 14-16 minutes. The cupcakes are done with a toothpick can be inserted and comes out clean; or spring back in the centre after being gently pressed.

  10. Allow to cool.

For the Lemon Curd (can be made day before)

  1. Cream together butter, sugar, and stevia in a stand mixer fitted with a paddle attachment.

  2. Add in lemon zest.

  3. Whisk in eggs.

  4. Add lemon juice and salt.

  5. When homogeneous, move mixture into a medium sauce pan. Set the stove to medium heat. Stir the curd constantly until it becomes thick. This will take about 8-12 minutes.

  6. Once thick, place in a bowl or jar and set in fridge. Allow to cool (3-4 hours, or overnight).

For the Meringue Frosting

  1. In a large glass bowl, whisk together egg whites, sugar, vanilla and salt.

  2. Bring a pot of water over medium heat to a simmer on the stove top.

  3. Place glass bowl over water on stove top. Stirring occasionally until the mixture reaches 160F (about 8 minutes).

  4. Pour mixture into the bowl of a stand mixer fitted with a whip attachment. On medium speed, whisk the egg mixture. Slowly bring the speed up to medium high. Mixture will become white, thick, and glossy. When it can hold stiff peaks, stop the whip, and scrap down with a spatula. This will take 5-7 minutes.

To Assemble

  1. Using a cupcake punch or a knife - cut out small holes in each cupcake (about 1.5cm diameter).

  2. Scoop in about 2 tsps - 1 tbsp of lemon curd.

  3. Top the cupcake with a mound of frosting. Use a spoon to gently press down, and pull up to create unique peak patterns.

  4. Using a kitchen torch, toast the frosting onto each cupcake.

  5. Enjoy!

What you’ll need

For The Cake

3/4 Cup Mango chunks (thawed if frozen)

1/3 Cup greek yogurt

1 tsp vanilla

1/3 Cup sugar

1/3 cup stevia or splenda

1 egg

3 Tbsps oil

1 1/2 Cups flour

1/2 Tbsp baking powder

1/2 tsp baking soda

1/2 tsp sea salt

For The Filling

Zest from 1 1/2 lemons

1/2 Cup sugar

1/4 Cup stevia or splenda

1/2 cup butter at room temperature

1/4 cup lemon juice

2 eggs

A pinch of sea salt

For the Frosting*

2 egg whites

1/3 Cup + 1 Tbsp sugar

1/2 tsp vanilla

1/4 tsp sea salt
*Frosting adapted form Flour

IMG_0300.JPG
IMG_0305.JPG

Campfire Cookies

IMG_0275.JPG

How to make it

  1. Preheat oven to 350F, and line a cookie sheet with parchment paper.

  2. In a stand mixer fitted with a paddle attachment (or a bowl), cream together butter & sugars.

  3. In a microwave safe bowl, melt 2/3rds Cup of chocolate chips, and allow to cool slightly.

  4. Beat in egg and vanilla.

  5. Scrap down sides, and add in melted chocolate. Mix.

  6. In a small bowl, sift together flour, cocoa powder, salt, baking soda, and baking powder.

  7. Fold into butter mixture with chocolate chips and teddy grahams.

  8. Using a large cookie scoop, scoop out dough onto prepared sheet - makes about 16 large cookies, or 22 small.

  9. Bake in oven for 10-14 minutes.

  10. Remove from oven and allow to cool slightly,

  11. To top - there are two options- Spoon out 1 Tbsp of marshmallow fluff on each cookie. Add in a few teddy grahams and a few chunks of milk chocolate. Then

    a) Use a butane kitchen torch to toast the fluff (the most fun way)!

    b) Set oven to broil (500F) and replace cookie sheet on top rack. Allow to toast for 30-60 seconds.

  12. ENJOY - seriously - while they’re warm and gooey! Just don’t burn your mouth! :)

What you’ll need

For the Cookies

1/2 Cup salted butter, room temperature

1/2 Cup packed golden sugar

1/4 cup white sugar

1 egg

1 tsp vanilla extract

2/3 cup dark chocolate chips, melted & cooled slightly

1 Cup + 2 Tbsps flour

1/4 Cup cocoa powder

1/2 tsp sea salt

1/2 tsp baking soda

3/4 tsp baking powder

+ Chocolate Chips to Mix In

+ A few Teddy Grahams roughly chopped

For Topping

1 Jar Marshmallow Fluff

20-30 Teddy Grahams

1/2 Milk Chocolate bar (or sub extra dark chocolate chips)

IMG_0254.JPG

Whiksey & Rye Chocolate Chip Cookies

IMG_8168.JPG
IMG_8178.JPG

How to make it

  1. Brown the butter! To do this, get out a small sauce pan. Place over medium heat, and put butter roughly cubed in. Melt down the butter, stirring occasionally. While butter is melting, get ready with a small bowl beside the stove sitting on an ice bath. Once melted, continue to cook, stirring frequently (about 3-5 minutes). The butter will begin to turn a golden colour, smell slightly nutty, and bubble. The mixture will get VERY loud - keep stirring. The butter will then begin to get ‘frothy’ or very bubbly, and go quiet. Keep stirring, watching the colour. When the mixture settles down and you can see it is brown, remove from heat, and pour into bowl. Note, you do not want to burn the butter. The goal here is to just toast the milk solids to give it a richer, slightly nutty flavour.

  2. Allow butter to return to a solid state at room temperature (2-3 hours).

  3. In a stand mixer fitted with a paddle attachment, cream together butter and sugar.

  4. Add in yogurt, egg yolk, vanilla, and whiskey.

  5. In a separate small bowl, sift together dry ingredients.

  6. Add in dry ingredients, folding in partially by hand.

  7. Add in (copious) desired amount of chocolate chips.

  8. Cover stand mixer with a tea towel (to avoid a flour shower), and combine on lowest speed until just combined. Do not over mix.

  9. Using a cookie dough scoop, scoop dough out into balls, and put into plastic (or reusable silicone) bag. This makes about 12-14 large cookies or 20 small.

  10. Place dough in fridge for 24 hours to chill.

  11. When ready, preheat oven to 350F. Line a baking sheet with parchment paper.

  12. Place cookie dough balls on prepared sheet.

  13. Bake for ~14-17 minutes (large) or 8-11 minutes (small). Note, cookies will look mostly done, but slightly puffy and soft to the touch. Remove from oven and allow to cool fully on the sheet for a soft chewy cookie, or return to oven for an additional 1-2 minutes for a crispier cookie.

What you’ll need

1/2 Cup Butter*

3/4 Cup Brown Sugar, packed

2 Tbsps white sugar

1 egg yolk

1/2 tsp whiskey

1 tsp vanilla

3/4 Tbsp greek yogurt

3/4 Cup all purpose flour

1/4 Cup + 2 Tbsps Rye flour

1/2 tsp sea salt

1/2 tsp baking soda

Chocolate Chips

IMG_8183.JPG

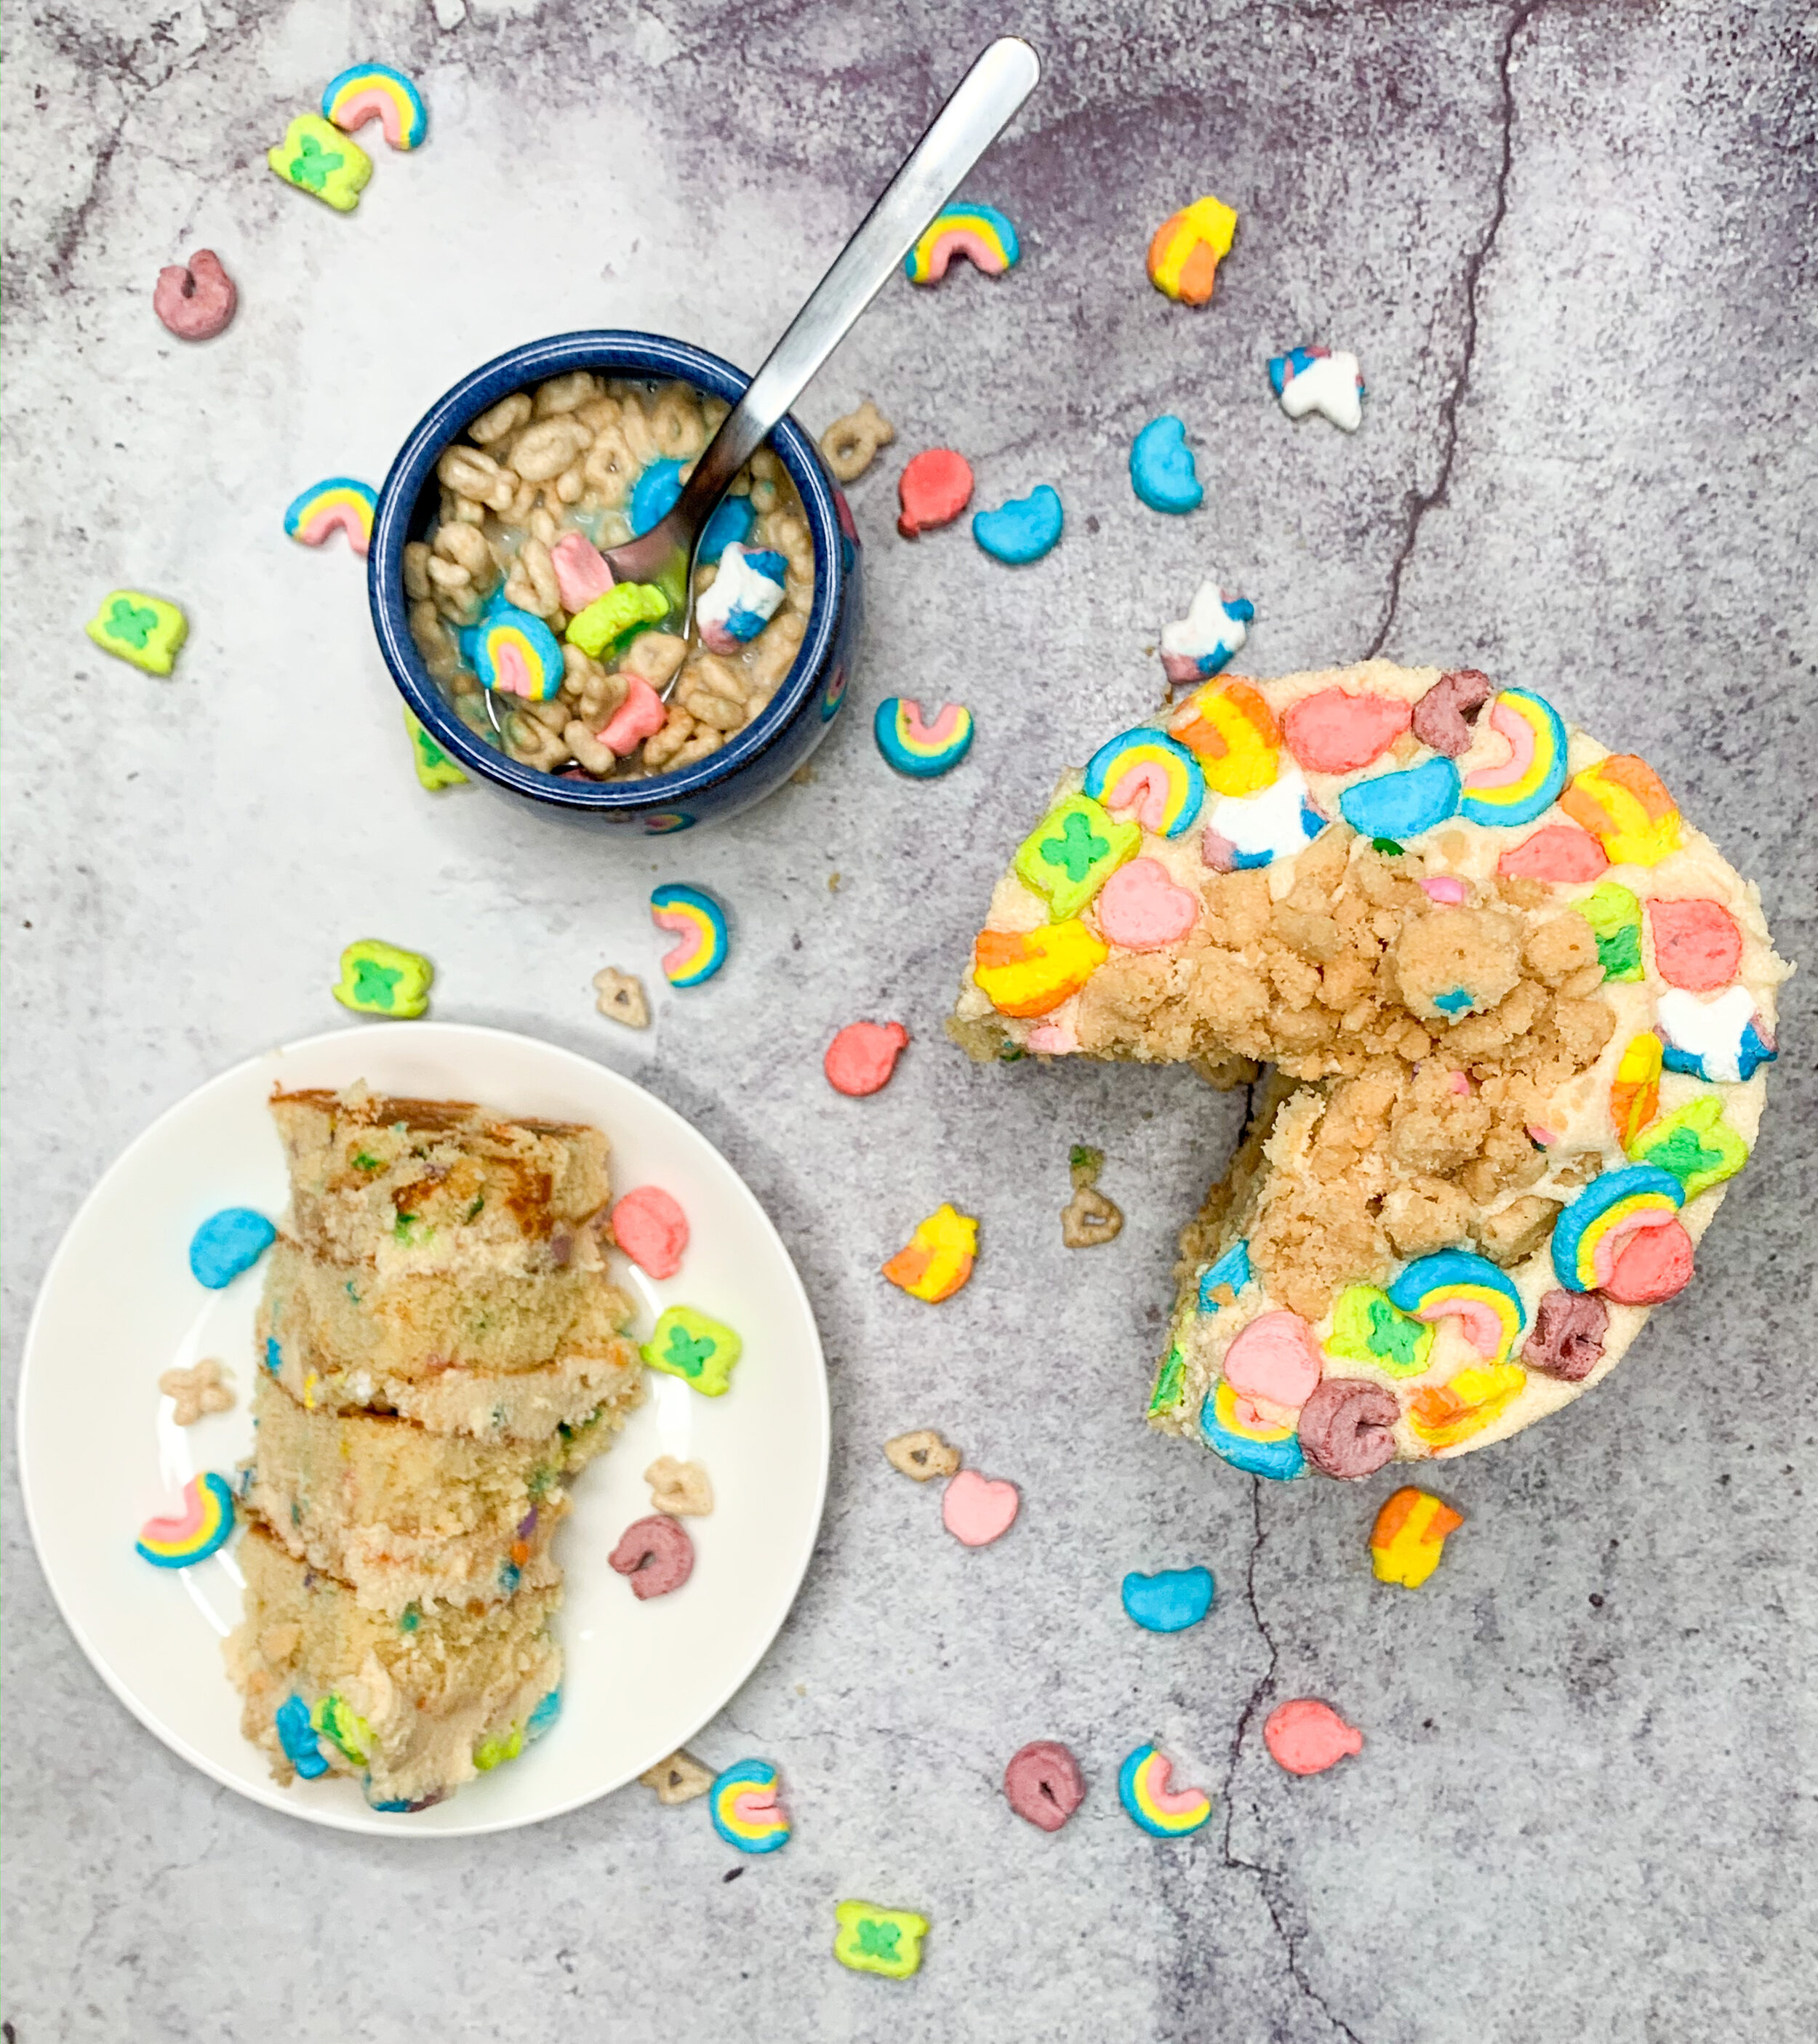
Lucky Charms Birthday Cake

Adapted from Milk Bar’s Birthday Cake Recipe

Cake for breakfast…let this whimsical cake take your taste buds over the rainbow!

IMG_6988.JPG
IMG_6999.JPG

How To Make it

Preparation

  1. Spray a quarter sheet pan with pam, and line with parchment paper.

  2. Combined milk and cereal to create cereal milk. Let sit, strain, and discard cereal.

  3. Preheat oven to 350F.

For the Cake

  1. In a stand mixer with a paddle attachment, cream together butter, vegetable shortening, and sugars for 3-4 minutes.

  2. Add in eggs, milk, lemon juice, vanilla, and grape seed oil.

  3. Sift together flour, sea salt, baking powder. Add into wet mixture.

  4. Fold in gently by hand at first, scrapping down sides. Add sprinkles (2 Tbsps) and finish combining on low speed, until smooth and silky (about 30 seconds).

  5. Evenly distribute batter into prepared sheet pan. Sprinkle with remaining sprinkles.

  6. Bake for 16-20 minutes. The cake is down when lightly golden, and springs back after a gentle press.

  7. Remove from oven and let cool for 30 minutes.

For the Cake Soak

  1. See preparation on cereal milk.

For the Cake Bits

  1. Reduce the oven heat to 300F, and line a cookie sheet with parchment paper.

  2. In a stand mix with a paddle attachment, combined flour, sugar, salt, baking powder, and sprinkles. Mix well.

  3. Add in oil and vanilla and sprinkles. Mix until crumbles form.

  4. Using a clean hand, pick up crumbs, squeeze to form larger balls, and crumble gently onto prepared sheet.

  5. Bake for 15 minutes.

  6. Remove from oven and let cool.

For the Frosting

  1. In a stand mixer fitted with a paddle attachment, beat together cream cheese and butter for 4-5 minutes until well combined.

  2. Sift in powdered sugar.

  3. Cover with tea towel to avoid a sugar shower, and beat until smooth.

  4. Add in corn syrup, vanilla, and sea salt. Beat until smooth and glossy.

To Assemble

  1. Using a 4” cake ring, punch out 3 full circles from the sheet cake. In the remaining area, punch out chucks of circles, that will come together to form your 4th layer. The rest of the cake can be used for sampling! YAY!

  2. Line a small plate with a piece of parchment paper. Place cake ring in center. Line ring with parchment, going up ~6 inches.

  3. Using the scrap pieces, Roughly form and press down a bottom layer in the ring. Generously bath in milk soak.

  4. Scoop a heaping spoonful of frosting onto the first layer. Using the back of the spoon, spread evenly edge to edge. Sprinkle with 1/4 of cake bits and a few lucky charms marsh mellows. Press down firmly. Add another half scoop of frosting, spread evenly.

  5. Place second layer of cake, soak, frost, sprinkle, frost, repeat!

  6. Do this until you have 4 layers. For the top layer, soak generously. Add the remainder of the frosting, and sprinkle cake bits in the middle. Cover the top edges with lucky charms cereal marshmellows.

  7. Allow to sit in fridge (10hrs) or freezer (3hrs) to set.

  8. Let sit at room temperature for 15-30 minutes before serving.

What you’ll need

For the Cake

1/2 Cup Butter, room temperature

1/8th Cup vegetable shortening

3 Tbsps brown sugar

3/4 Cup + 1/2 Tbsps white sugar

2 eggs

1/3rd Cup cereal milk*

1 tsp lemon juice

2 tsps vanilla

2.5 Tbsps grape seed oil

1 1/3 Cup cake flour

1/2 tsp sea salt

1 tsp baking powder

1/4 Cup rainbow sprinkles, divided

For the Cake Soak

1/3 Cup cereal milk*

For the Cake Bits

1/3 Cup white sugar

1 Tbsp brown sugar

1/2 Cup cake flour

1/4 tsp sea salt

1/4 tsp baking powder

1 Tbsp rainbow sprinkles

2.5 Tbsps grape seed oil

2 Tbsps vanilla extract

For the Frosting

1/2 Cup butter, room temperature

1/4 Cup cream cheese, room temperature

1 Cup powdered sugar, sifted

1 Tbsp light corn syrup

2 Tbsps vanilla

1/2 tsp sea salt

For Assembly

Lucky Charms Cereal

Extra sprinkles

*Cereal milk

  • Combined milk with 1/4 cup of frosted flakes

  • Allow to sit for 30 minutes. Put through strainer, squeezing milk out of cereal.

IMG_7015.JPG
IMG_7024.JPG

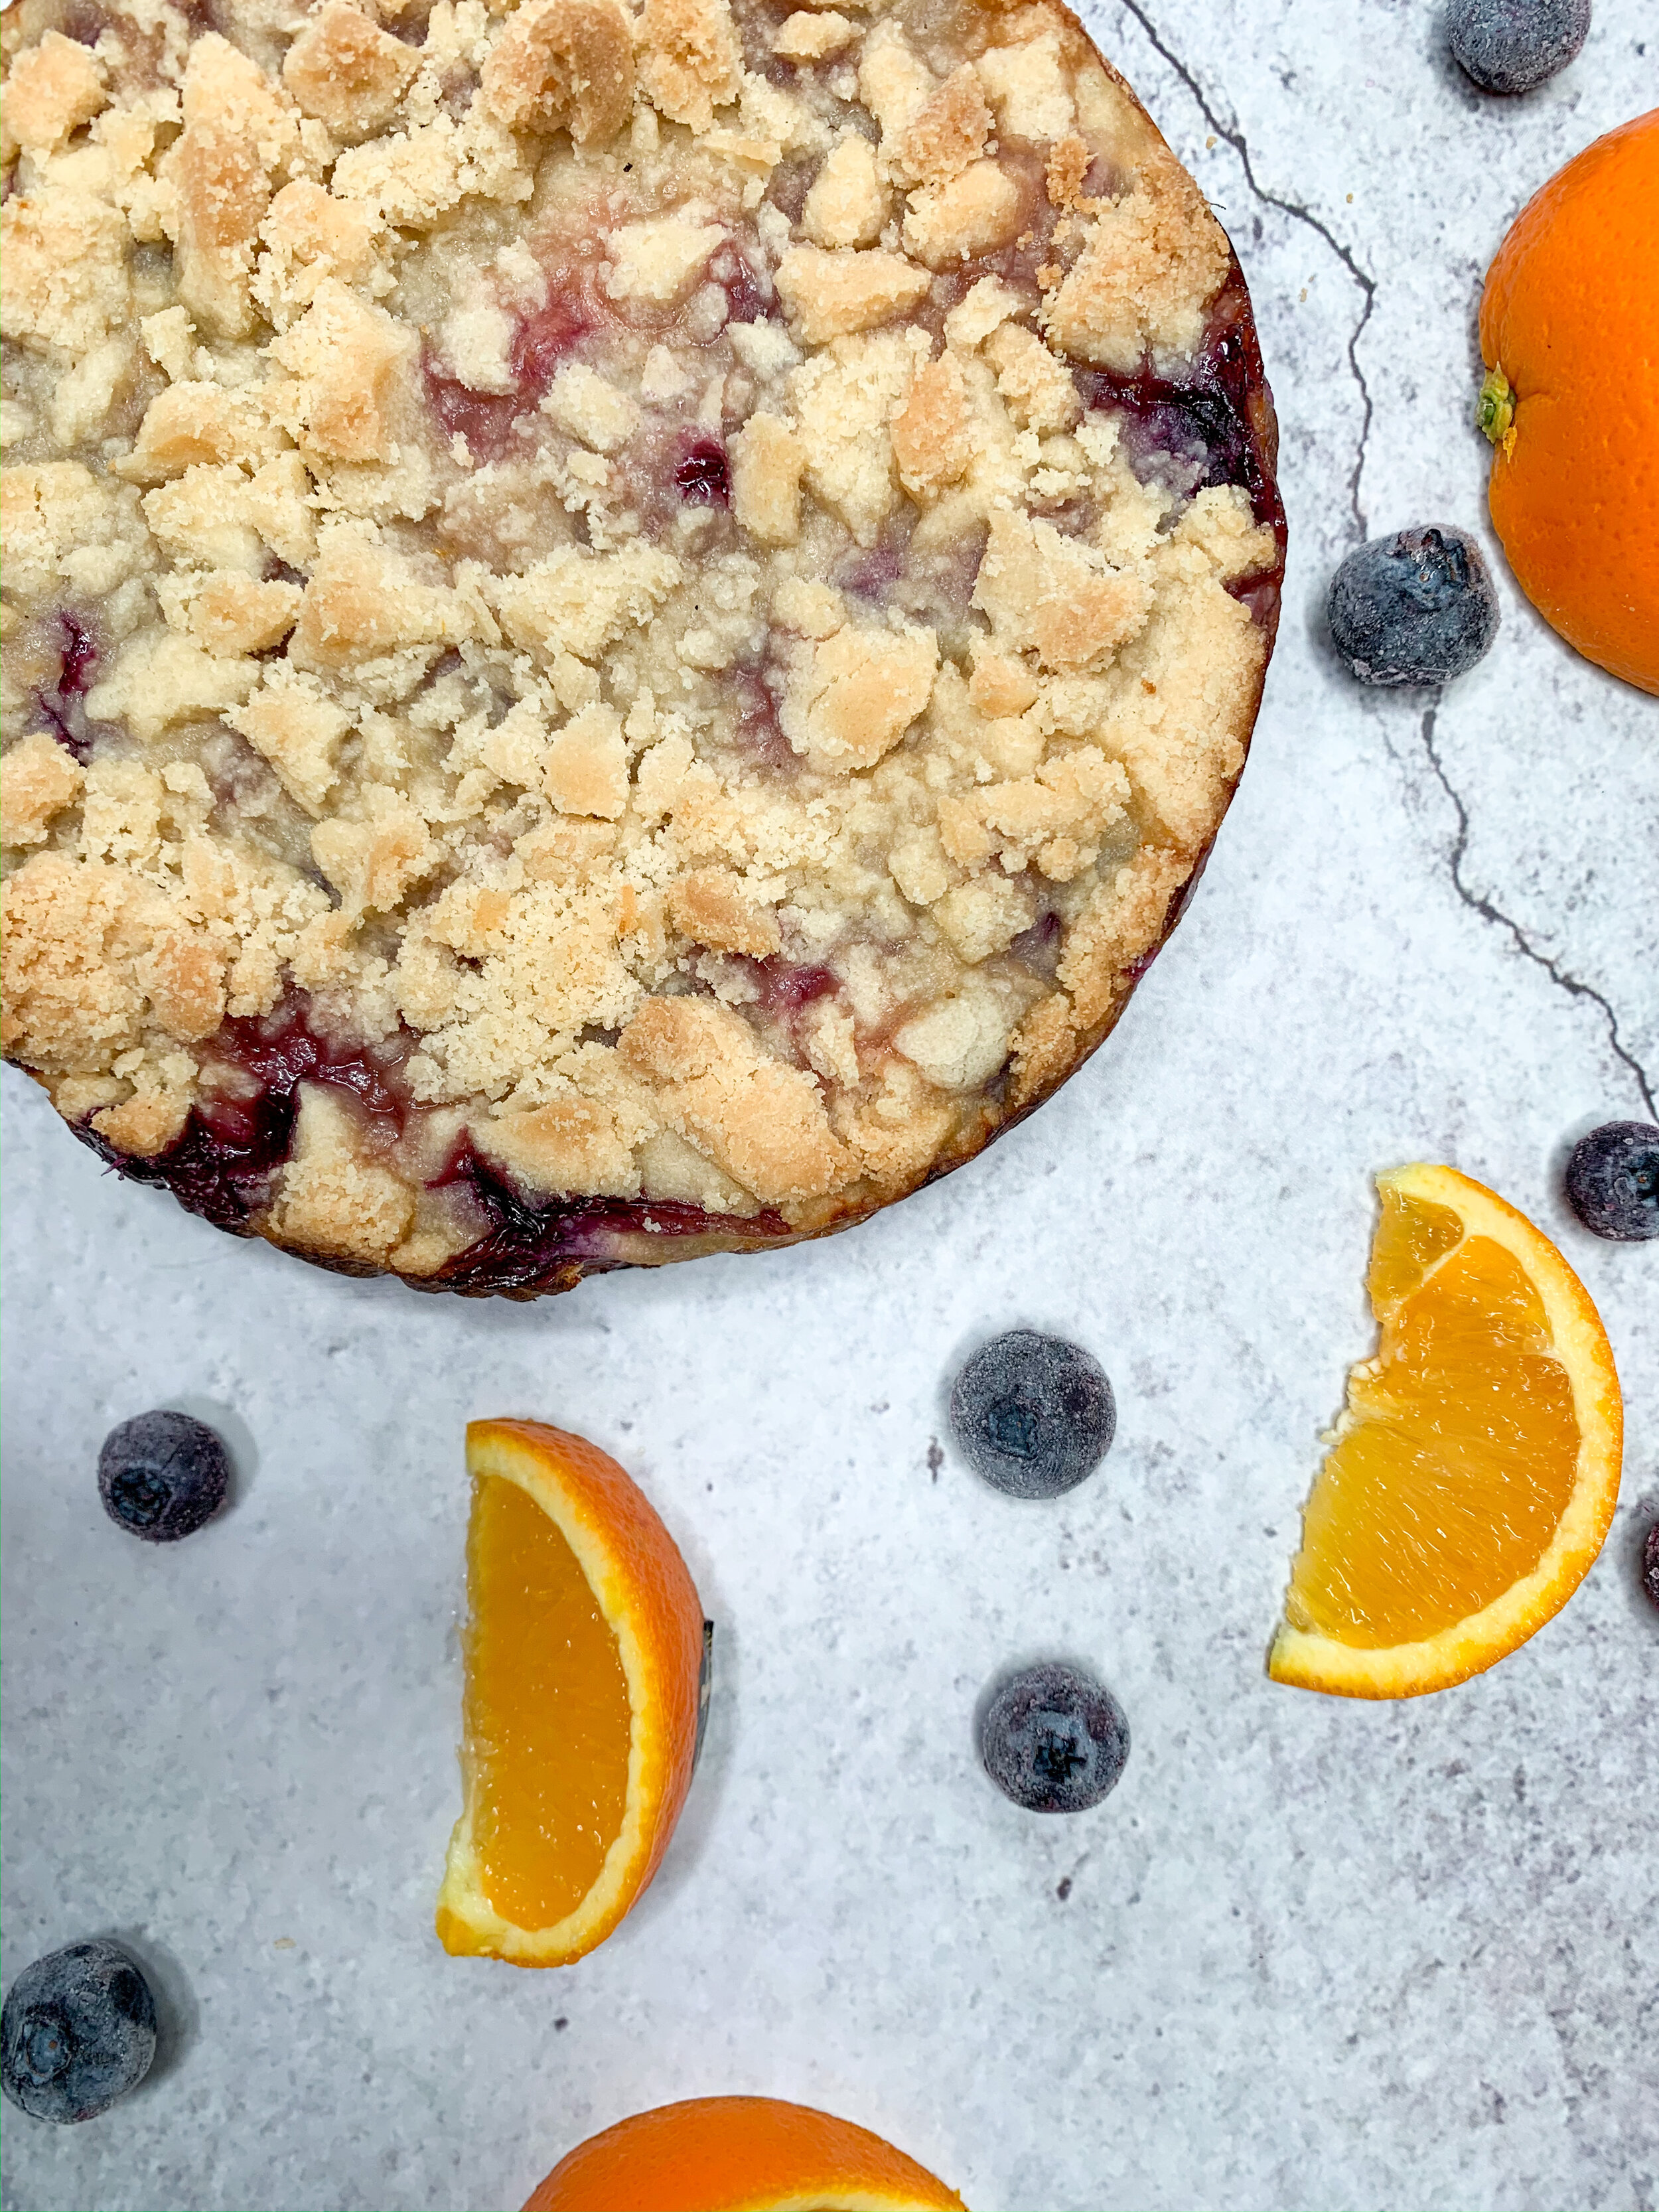
Baby Blueberry Pie

IMG_6934.JPG
IMG_6951.JPG

How to make it

Prep

  1. Line a 6” cake pan with parchment.

  2. Preheat oven to 350F.

Crumb

  1. In a stand mixer with a paddle attachment (or by hand), cream together butter and sugar.

  2. Add flour and sea salt. Beat until it becomes a homogenous sand texture with a few large clumps.

  3. Press 1/3rd of mixture into the bottom of the pan.

Filling

  1. In a small bowl, whisk together egg, yogurt, sweetener vanilla and flour.

  2. Spread on top of shortbread base, shaking the pan gently to help distribute.

  3. Reuse the bowl (to save dishes) to combine frozen berries, monk fruit sweetener, lemon juice, corn starch, and orange zest.

  4. When berries are well coated, distribute evenly into pan. Jiggle gently to ensure they’re distributed throughout.

  5. Using your (clean) hands, pick up remaining shortbread mixture, squeeze gently, and crumble over top. This will help create larger chunks.

  6. Bake for 50-60 minutes.

  7. Allow to cool completely before serving. Personally, I think this tastes best out of the fridge with a little dollop of whipped cream or yogurt.


What You’ll Need

Crust & Crumb

1/4 Cup butter, room temperature

1/4 Cup granulated sugar

2 Tbsps golden sugar (packed)

1/2 tsp sea alt

3/4 Cup flour

Filling

1 Egg yolk

1/4 Cup plain 0% mf greek yogurt

3 Tbsps monk fruit sweetener

1 tsp vanilla

1/2 Tbsp flour

1 Cup frozen blueberries

2 1/2 Tbsps monk fruit sweetener

1 Tbsp lemon juice

1 tsp cornstarch

1 tsp orange zest

IMG_6966.JPG
IMG_6974.JPG

PB & Banana Cake

IMG_6620.JPG

How to make it

For The Cake

  1. Preheat the oven to 350F and line a 10 x 15inch quarter sheet pan with parchment.

  2. In a stand mixer fitted with a whisk attachment, beat sugar and eggs for 4-5 minutes until light and fluffy.

  3. While beating, in a small bowl mash bananas. Combine yogurt and vanilla.

  4. In another small bowl, sift together flour, baking soda, salt, and cinnamon.

  5. Turn stand mixer down to low speed. Slowly drizzle in oil down the side of the bowl.

  6. Add in banana mixture and whisk until combined.

  7. Gently fold in dry ingredients by hand.

  8. Spread batter into prepared sheet pan. Sprinkle with chocolate chips.

  9. Bake for 20-25 minutes. The cake is done when you can press gently on the edge and it springs back, and when a toothpick inserted comes out clean.

  10. Allow to cool for at least 30 minutes.

For The Frosting

  1. In a stand mixture fitted with a paddle attachment, beat together butter, cream cheese, and peanut butter until homogeneous with no lumps.

  2. Add in corn syrup.

  3. Sift in powdered sugar. mix well

  4. Add in salt, baking powder, lemon juice, and vanilla. Mix well.

To Assemble

  1. Using a 6” cake ring, punch out 2 full circles from cake.

  2. With the remaining areas of cake, punch out 2 crescent moons, and save inner scraps - this will become your bottom layer.

  3. Line a 6” ring with a parchment paper ring.

  4. Place 2 crescents in the bottom, and fill in layer with remaining inner scraps (avoid using edges).

  5. With a spoon, add in 1/5th of frosting, spread edge to edge. Sprinkle in 1/2 of crushed Oreos, and push down.

  6. Add in another 1/5th of frosting, spreading edge to edge.

  7. Place 2nd layer (full circle) on top. Repeat above frosting process.

  8. Place 3rd layer (fill circle) on top. Spread remaining frosting. Place 5 full Oreos vertically on top of cake to decorate.

  9. Place cake in freezer for 3 hours to set.

  10. Remove from cake ring and parchment paper. Allow to thaw for 20-30 minutes before serving. Best eaten cold with a scoop of vanilla ice cream!

What you’ll Need

For The Cake

3 1/2 Large (or 4 medium) ripe bananas

2 Tbsps greek yogurt

2 tsps vanilla extract

1 Cup white sugar

2 eggs

1/2 Cup vegetable oil

1 2/3 Cups flour

1 tsp baking soda

1 1/2 tsps cinnamon

1 tsp sea salt

1/4 Cup dark chocolate chips

For the Frosting

1/2 Cup Butter, room temperature

1/4 Cup cream cheese, room temperature

1/2 Cup Peanut Butter

2 Tbsps white corn syrup

1 1/4 Cups powdered sugar

1/2 tsp sea salt

1/4 tsp baking powder

1 tsp vanilla extract

1/2 tsp lemon juice

8 Thin Oreos, chopped + 5 Full for topping

IMG_6653.JPG

Almond Roca (Christmas Crack)

How to make it

This is a time sensitive recipe - so I HIGHLY recommend you get everything ready first, and read the full instructions! Alternative, watch the quick 5 minute video in this post for step by step directions! :) The entire cooking process will take ~30 minutes.

  1. Prepare! Grab a heavy bottom sauce pan and place on stove top. Near the stove, have either a candy thermometer ready, or a cup of ICE cold water, a spatula (and plate to rest it on), all your ingredients measured.

  2. Grease a cookie sheet with butter- I do this by taking the foil of the butter in the recipe and rubbing it on the sheet edge to edge.

  3. Over medium heat, combine salted butter, sugar and water. You MUST use salted butter - it stabilizes the mixture.

  4. Once melted, give it a good stir to ensure mixture is homogeneous.

  5. Allow mixture to cook over medium heat, stirring every 3-4 minutes to ensure sugar does not burn to bottom of pan.

  6. Mixture will go from a pale anemic bubbling mixture to a light brown. At this point, sprinkle in cream of tartar. This will help with candy texture and prevent crystallization.

  7. Once mixture is light brown, place thermometer into pan, and stir every minute or so.

  8. Once mixture hits 295F, turn off heat, remove from burner, and stir in almonds, and spread onto cookie sheet.

    ALT: If you DO NOT have a candy thermometer, once the candy starts to brown, place small drops into a cup of ICE cold water next to the stove. If the drops come out bendy at all, it is NOT ready. If they form a hard ball and can be ‘cracked’ the mixture ready!

  9. Allow mixture to cool.

  10. On the stove top, or in the microwave, temper your chocolate (melt it 90%, then stir in a little un-melted chocolate.

  11. Spread over the cooled candy base in a thin even layer. Sprinkle with remaining chopped roasted almonds.

  12. Let cool, and then roughly break apart or chop.

  13. Enjoy ! This makes a great gift if you package it up!

What you’ll need

Ingredients

1 Cup Salted Butter (High quality such as Gay Lea)

1 Cup Sugar

2 Tbsp Water

1 Cup Roasted Almonds, Chopped (+1 Tbsp reserved for topping)*

1/2 tsp Cream of Tartar

60 Grams Milk Chocolate (Lindt)

60 Grams Dark Chocolate (Lindt)

1/2 tsp vanilla (optional)

*Roast in oven @ 325 for ~15-20 minutes (low and slow).

Prep / Equipment

Heavy Bottom Sauce Pan

Candy Thermometer (or cup of ice cold water)

Heat Resistant Spatula

Cookie Sheet

Pumpkin Pie Squares

IMG_4277.jpg


How to make it

  1. Line a 9x13 pan with parchment paper and preheat the over to 350F.

  2. In a stand mixer with a paddle attachment, cream together butter and sugar. Add in flour and mix until just combined.

  3. Press shortbread crust into baking pan, spreading evenly.

  4. Bake for 15 minutes, until edges are just lightly golden.

  5. While the base bakes, combine pumpkin, sugar, eggs, coconut milk, coconut nectar, vanilla, cinnamon, lemon, and spices in a blender. Mix on high, scrapping edges occasionally until combined into a silky homogeneous mixture.

  6. Remove base from oven and pour on pumpkin layer. Using a spatula, spread evenly.

  7. Return to oven and bake for an additional 35-45 minutes. They are done when you press on the centre gently and it springs bag.

  8. Allow to cool fully before cutting.

  9. Serve with whipped cream, ice cream, or powdered sugar.

What you’ll Need

Base

1 Cup Butter, room temperature

2 Cups Flour

1/2 Cup Powdered Sugar

Dash of salt

Pumpkin Layer

2 Cup Pumpkin Puree

3/4 Cup Brown Sugar

3 Eggs

1/2 Cup Coconut Milk

1/3 Cup Coconut Nectar

1 tsp Vanilla

2 tsps Lemon Juice

1 tsp Cinnamon

1/2 tsp All Spice

1/2 tsp Ginger

Dash of salt

IMG_4295.jpg

Chocolate Chip Cookies

Literally...not an exaggeration... THE BEST EVER chocolate chip cookie out there.

Don't mess with a classic - this is my all time favourite chocolate chip cookie recipe (New York Times Original)

cookies 4.jpg

What you'll need

1 1/4 Cups salted butter (room temperature)

1 1/4 Cups brown sugar

1 Cup + 2 Tbsp white sugar


1 tsp vanilla

2 eggs


1 2/3 Cups bread flour

2 Cups (-2) Tbsp cake / pastry flour

1 1/2 tsp baking powder

1 1/4 tsp baking soda

1 1/2 tsp sea salt


ALL THE CHOCOLATE CHIPS your heart desires! <3

How to make it

  1. In a stand mixer fitted with a paddle attachment, cream together the butter and sugars (approx 3-5 minutes)

  2. Add eggs and vanilla. Blend again. Be sure to scrape the sides as you go.

  3. In a separate large bowl, sift together dry ingredients.

  4. Add dry ingredient mixture slowly. *PRO TIP - pour in 1/2 of the flour, mix in partially with spatula, cover stand mixer with a dish towel, and combined on low for approximately 30 seconds. Add remainder of the flour and repeat. Be sure not to over mix.

  5. When dough is almost homogeneous (a little flour not quite mixed in, toss in chopped chocolate or chocolate chips. Blend until just combined.

  6. Scoop dough out into cookies (~30 large cookies, ~50 normal sized cookies), and place in reusable ziplock bag. (alternatively wrap dough in log chucks to chill)

  7. Chill dough in fridge for a MINIMUM of 24 hrs. I normally do 48hrs.

  8. Note, dough can be frozen in pre scooped balls and easily thawed and baked for cookies in a flash!

  9. Preheat oven to 350F and place cookies on a cookie sheet lined with parchment paper.

  10. Bake for 13-15 minutes (large cookies) or 9-12 minutes (small cookies).


cookies1.jpg